Crash Course
| Networking |
|---|
| Fish-Net |
🚧 This documentation page is a work in progress 🚧
This is configured to use UDP sockets with the Tugboat transport. WebGL requires the Bayou transport, which is not included in this demo yet.
Prerequisites
- Unity 2020.3 + Linux Dedicated Server build module
- Rivet CLI
Getting started
Testing Locally
Rivet's APIs are all available to test locally with fake data. This is useful for testing your game without having to deploy to Rivet.
- Run
rivet init- You will need to create a new game if you haven't already
- Select
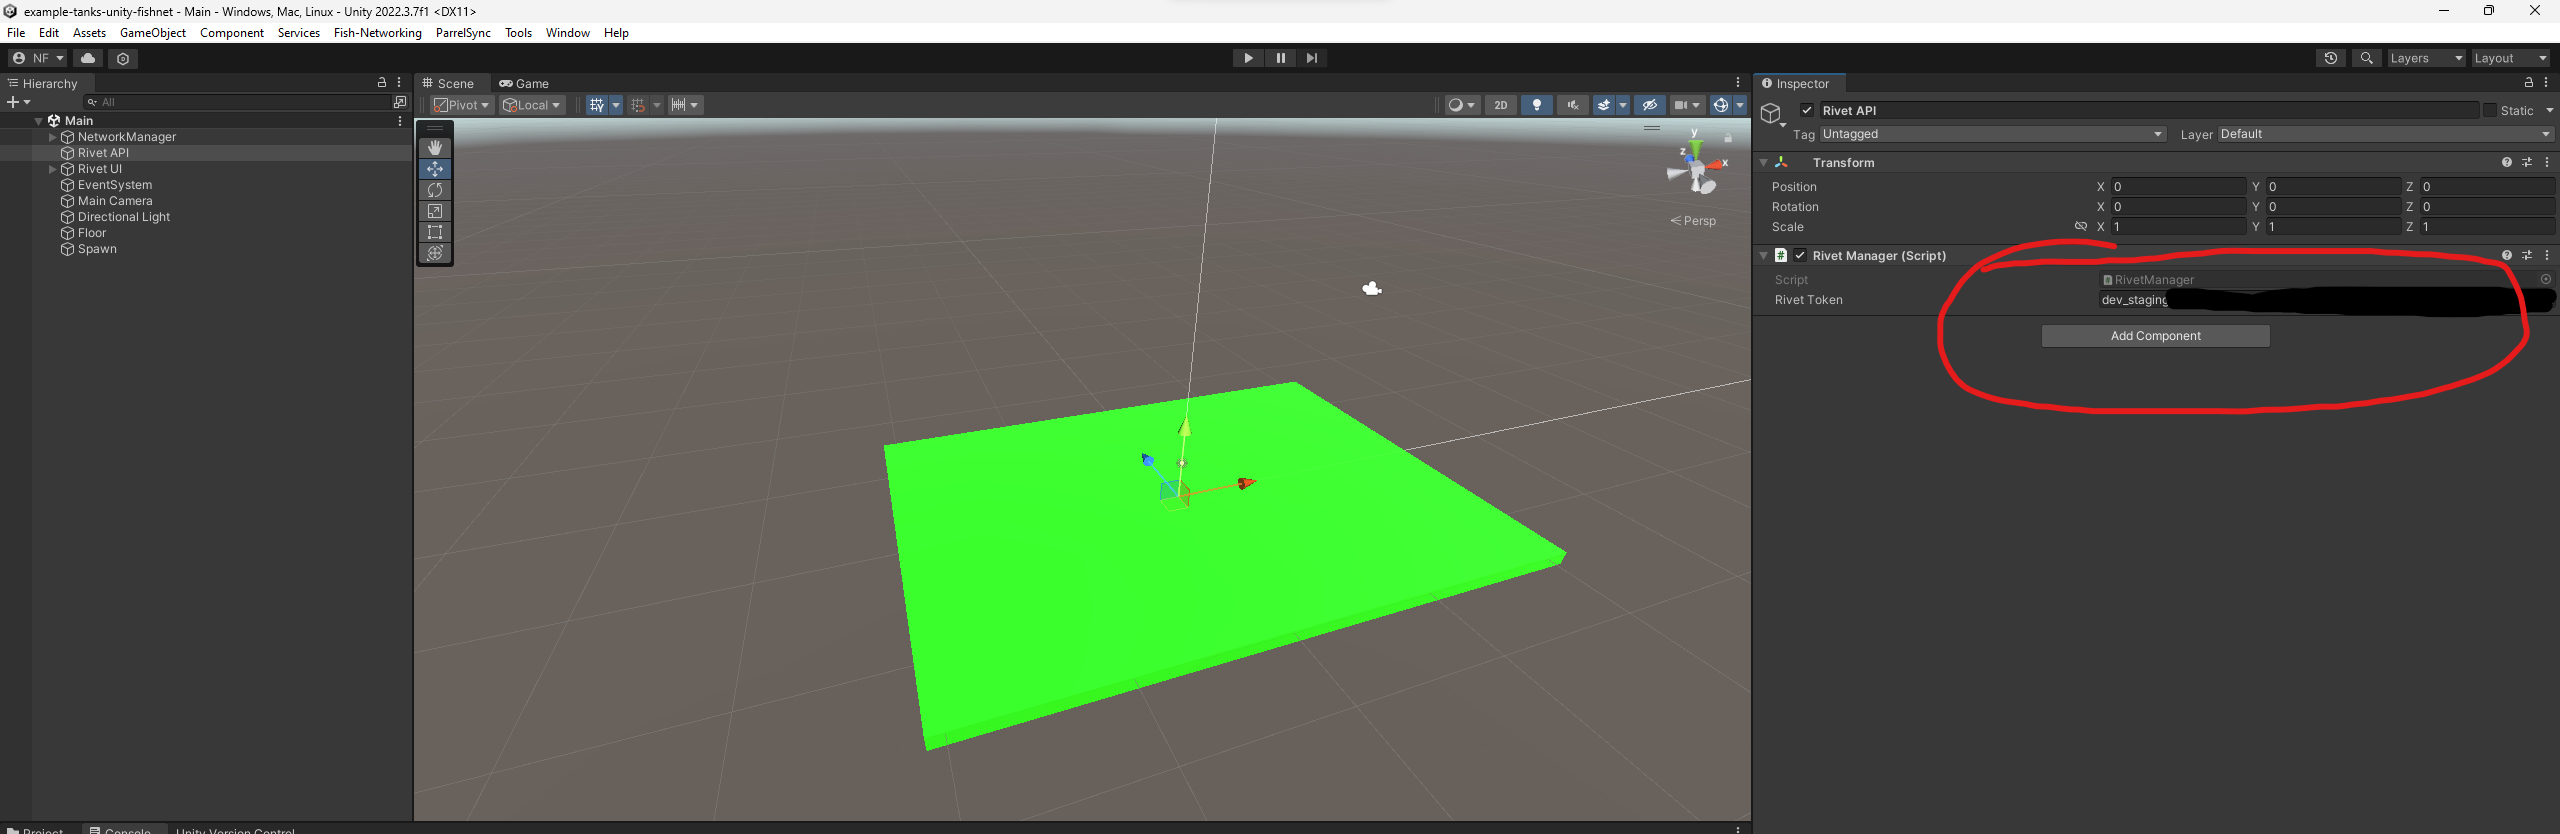
unityengine type - Once complete, copy the token that looks like
dev_staging.XXXXto your clipboard
- Paste this token under the API token
- Click play in the editor and click Find Lobby
- You should see a lobby ID of
00000000-0000-0000-0000-000000000000in the top left. This means you're testing against your local machine. - If this causes an error, you may need to navigate to File > Build Settings and switch to the Windows, Mac, Linux platform
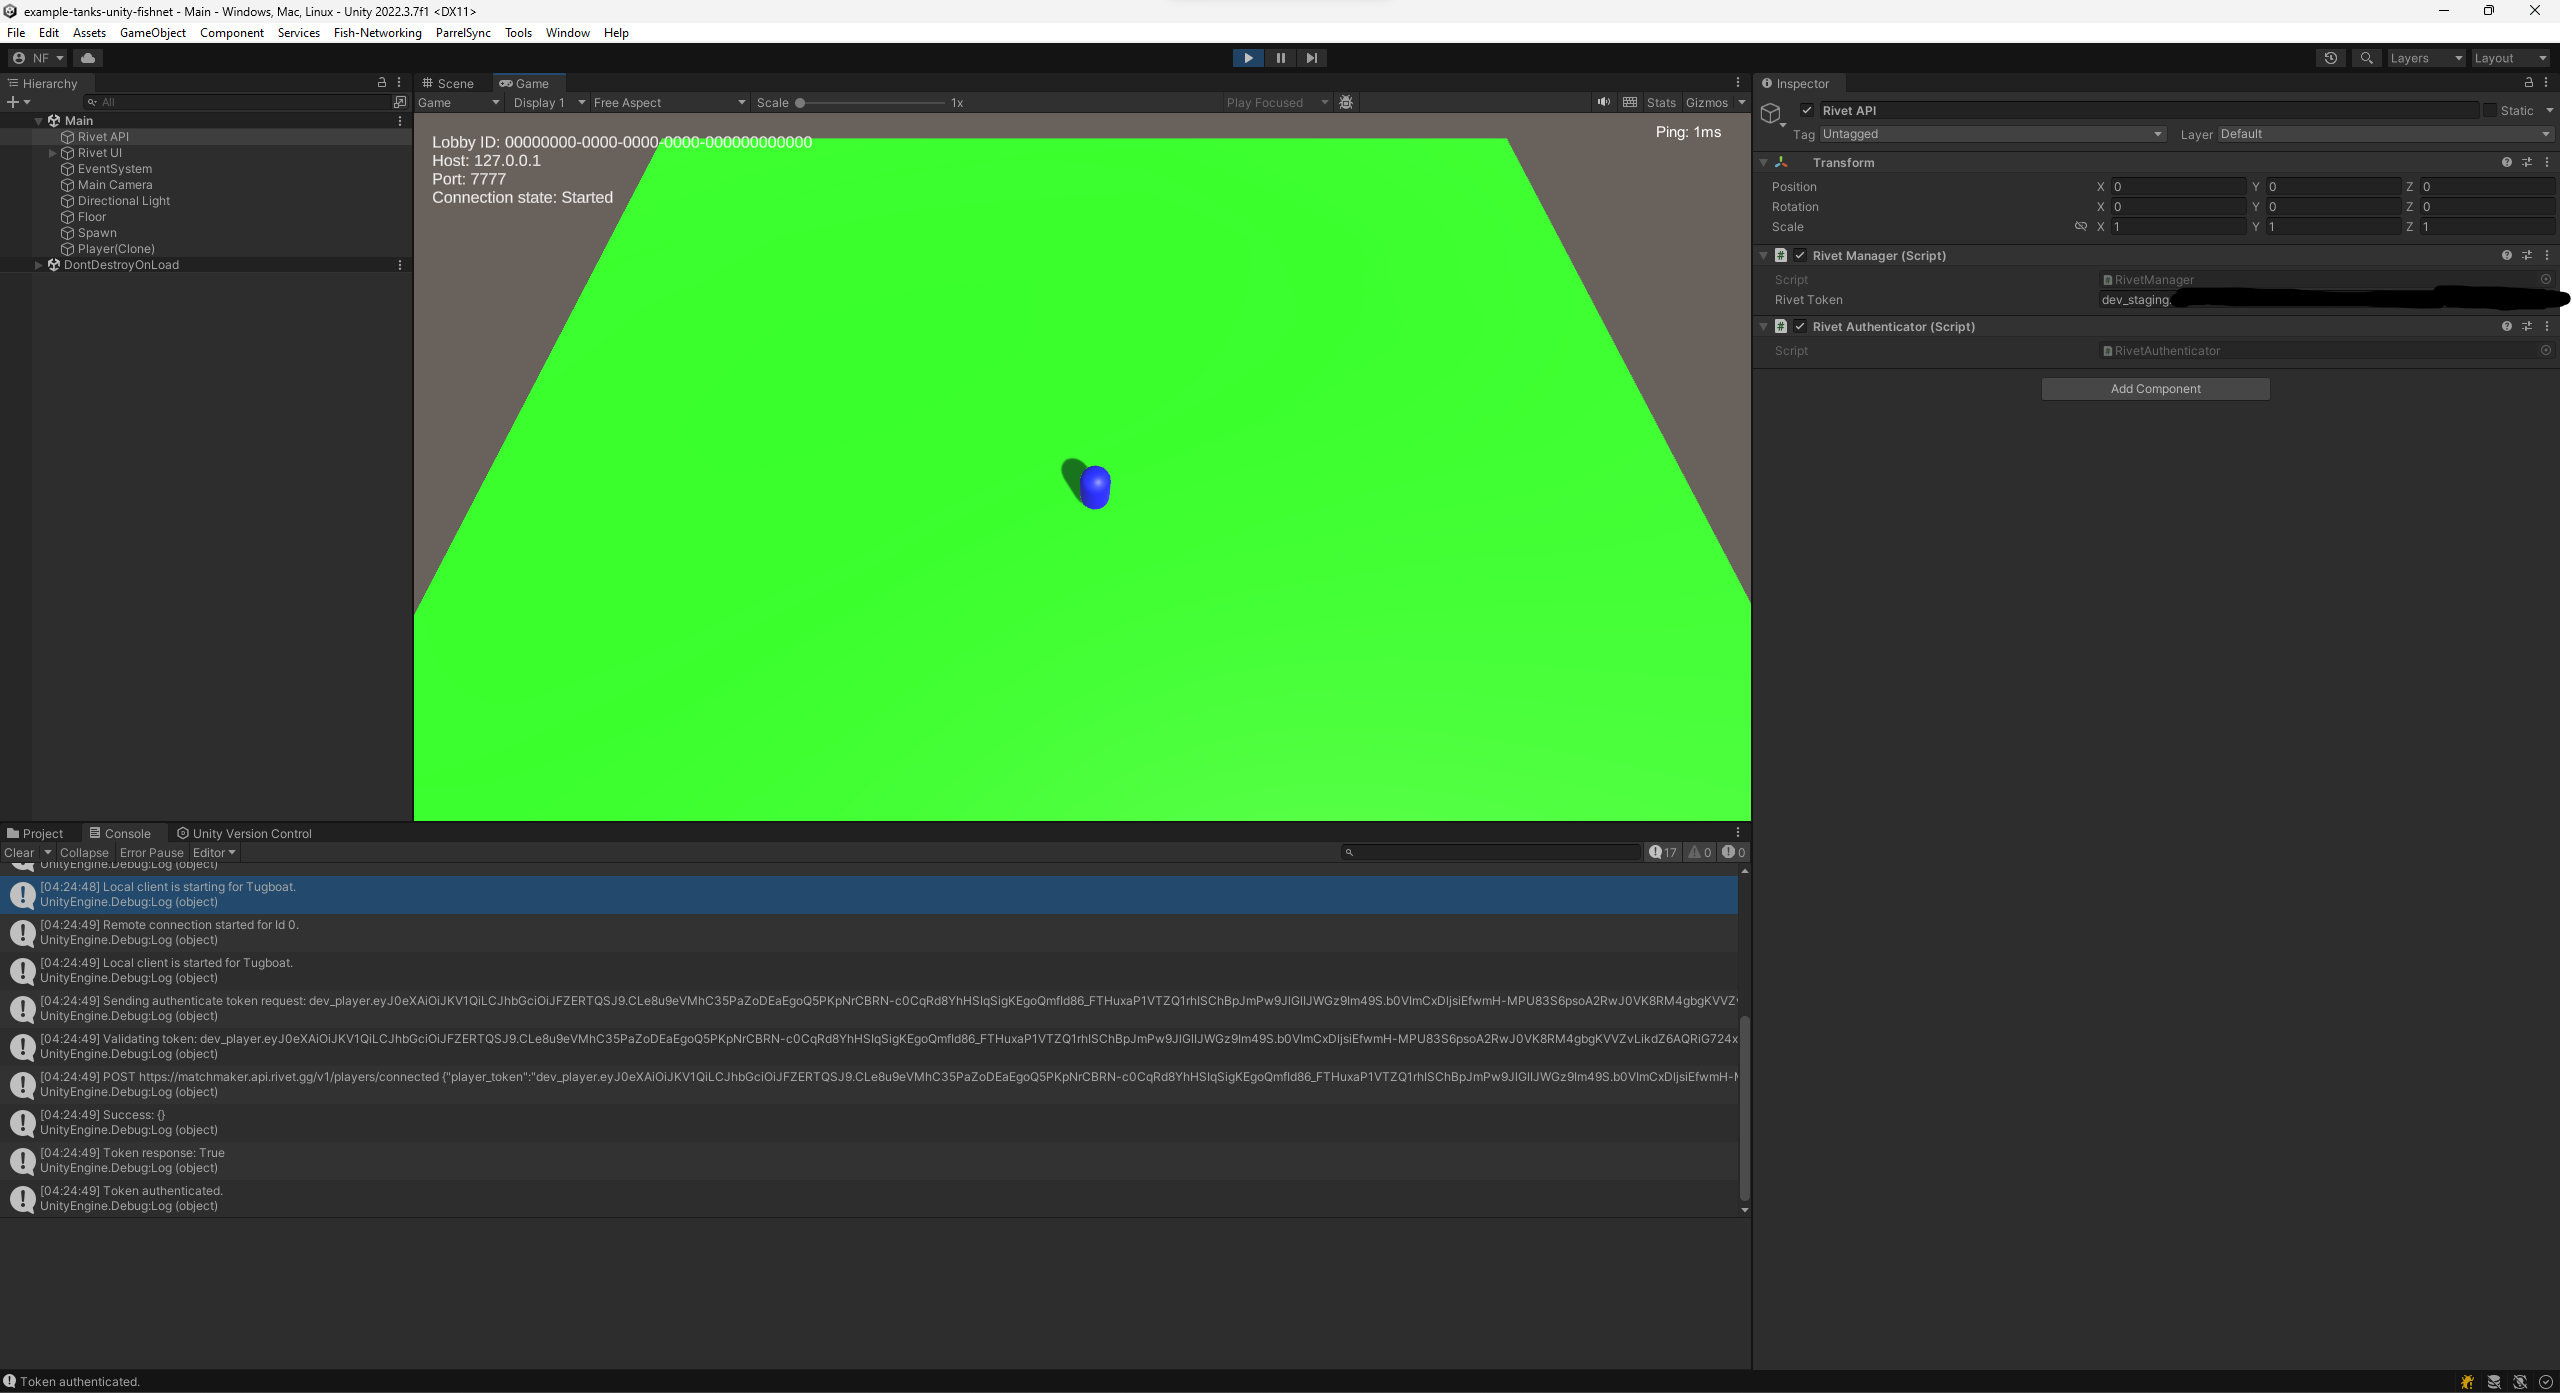
- You should see a lobby ID of
Deploying to Rivet
Deploying the server
- Click File > Build Settings
- Select Dedicated Server from the list of platforms
- Click the Switch Platform button if it's not selected already
- Validate Target Platform is set to Linux
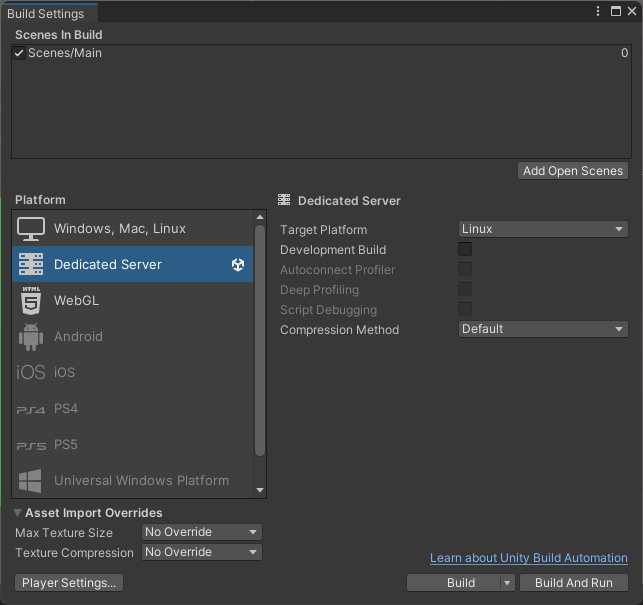
- Click Build
- Create a folder named
build/LinuxServerand save with the nameLinuxServer. Click Save.- Validate that you see a file located at
build/LinuxServer/LinuxServer.x86_64
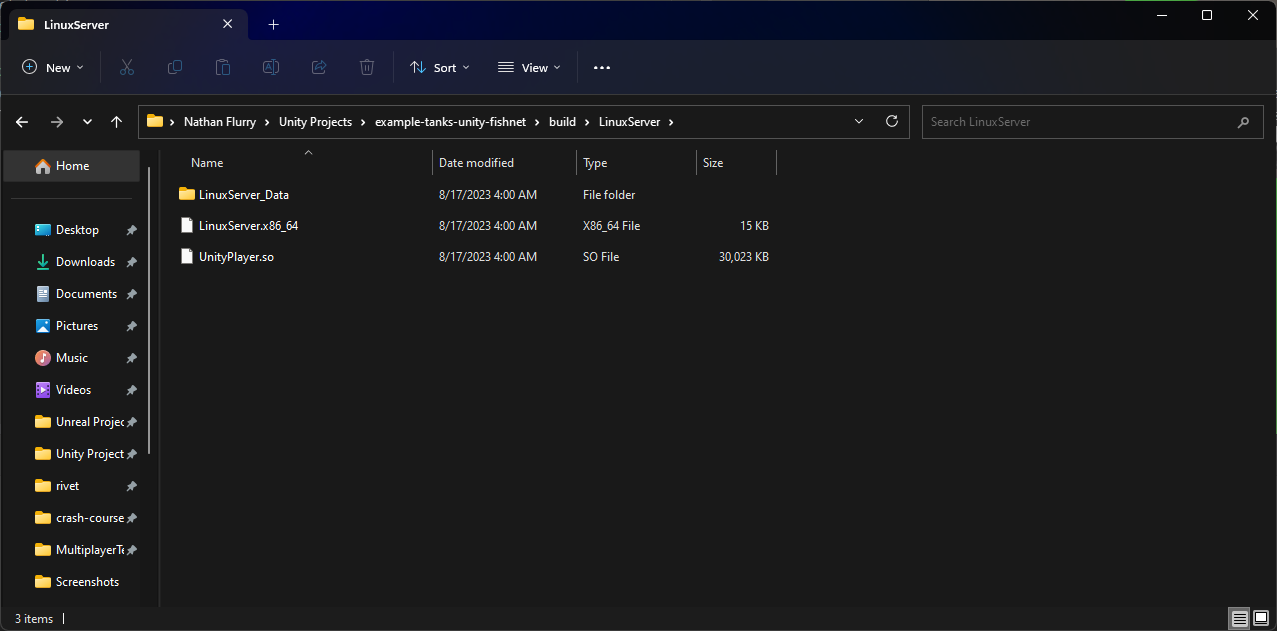
- Validate that you see a file located at
- Run
rivet deploy -n prodto deploy to production- You can now see your game servers running in the Rivet dashboard. These will automatically scale up and down based on player demand.
Connecting to the server
- Open the Rivet Hub
- Navigate to Your Game > API
- Under Production, click Create Public Token and click the copy button
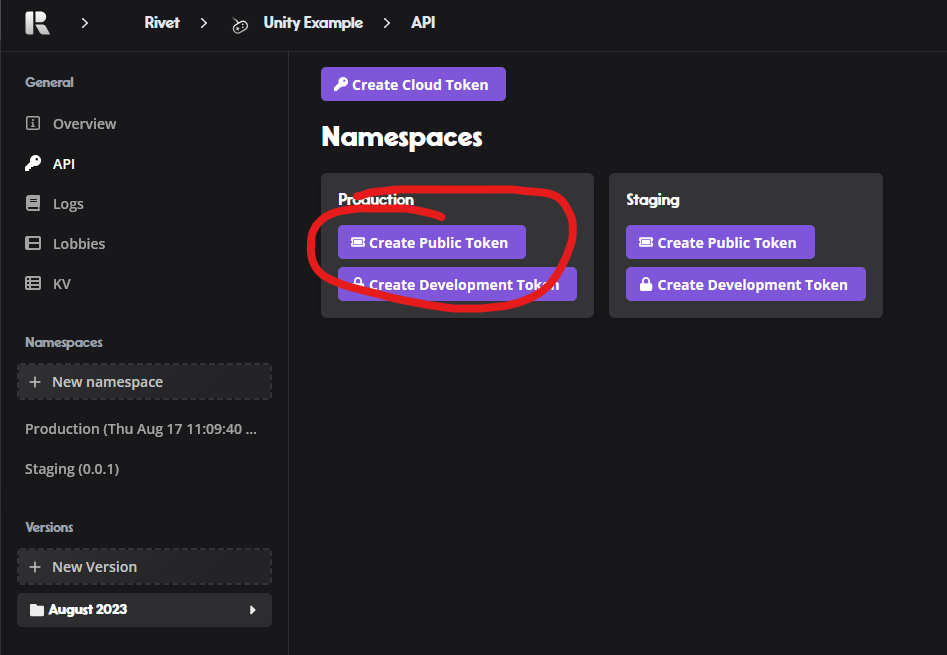
- Paste this token under the Rivet Token field on the Rivet API game object. This token should look like
pub_prod.XXXX. - Click play
Importing in to your own project
- Install the following Unity assets
- FishNet
- Json.NET
- ParrelSync (optional, helps with testing multiple clients)
- Copy the following files
Assets/Scripts/RivetManager.cs(provides API endpoints for Rivet and manages client/server state)Assets/Scripts/RivetAuthenticator.cs(integrates Rivet's authentication with FishNet,automatically created byRivetManager)
- Create a game object in your scene with the
RivetManagercomponent - Call
_rivetManager.FindLobby(...)to connect to a lobby (seeRivetUI.csfor example)